Posts

If your home is left unoccupied for weeks or months at a time, your standard homeowners insurance policy might not provide coverage in the event of a claim. Any damages or losses that occur would have to be paid out of pocket unless you have vacant property insurance. 

Unoccupied and vacant homes present a greater insurance risk than an occupied home. The emergency response time is slower and there is an increased probability of a break-in occurring. This increased risk has resulted in the exclusion of these properties in a standard homeowners insurance policy. If you own an empty or vacant house, you should purchase vacant property insurance to protect yourself and your home.

Generally speaking, if your home is left unattended for 30 days or more you’ll want to purchase vacant property insurance. Before leaving your home vacant for an extended period of time, you should contact your insurance agent and discuss how your insurance carrier defines vacancy. Below are some scenarios where a homeowner might find the need for vacant property insurance.

  • You own a vacant home that you only visit a few times per year.
  • You’ve purchased a home, but won’t be moving in for several weeks.
  • You’re constantly traveling for weeks at a time.
  • You’re remodeling your home and won’t be living there during renovations.
  • You’re renting out your home and you’re in between tenants.

Source: https://www.valuepenguin.com/unoccupied-and-vacant-home-insurance

🌷Spring is here!  🌸  After a long dark and cold winter, the bright sun and warm winds of the spring are a breath of fresh air! The only downside? All that sunlight helps you see your leaf-filled gutters, cracked sidewalks, and dead plants in the flower beds. Get your home in shape for spring with this checklist!

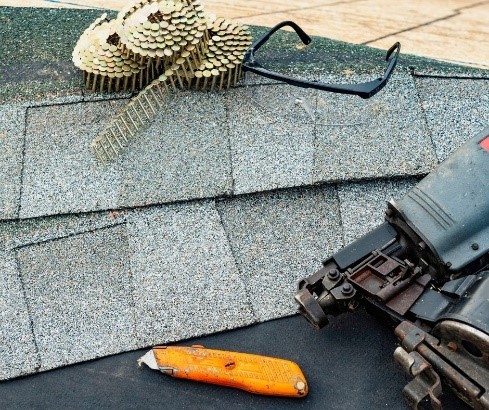
1. Examine Roof Shingles: Examine the roof to see if any shingles were lost or damaged under the winter snow and ice.

2. Check the Gutters: Loose or leaky gutters can cause improper drainage, which can lead to water in your basement or crawlspace during the spring rain.

3. Inspect the Concrete: Inspect concrete slabs for signs of cracks or movement. Fill cracks with concrete crack filler or silicone caulk, power-wash, and then seal the concrete.

4. Remove Firewood: Firewood stored near the home for winter should be moved at least 18 inches off the ground and at least 2 feet from the structure.

5. Check Outside Faucets: Check outside faucets for freeze damage. While you’re at it, check your garden hose for dry rot.

6. Repair Window Screens: You will want to open the windows to let the fresh air in. Ensure small holes and tears are repaired so bugs don’t get in.

This is just a short list of items you can do to prepare your home for the spring. Winter was nice and cozy but, we are ready for the spring sunshine! While you are preparing your home for the spring, it is a great time to review your homeowners insurance! 

Source: https://www.hgtv.com/lifestyle/clean-and-organize/10-home-maintenance-tips-for-spring-pictures

A.C. Marmo & Sons, Fairfield, Fairfield NJ, NJ, New Jersey, Insurance, Auto Insurance, Jumpstart A Car, How To Jumpstart A Car, Dead Car Battery,

Trouble happens. You left your lights on and now you’re stuck with a dead car battery. While learning how to jump start a car can be easy, there are risks in it if done so incorrectly. As your insurance agent, we care about your safety so we put together the following guide on how to properly get you and your car charged and back on the road.

What do you need to jump start a car?

Before you can recharge and get going, you need a few basics: jumper cables and a power source – either a portable jump battery (a jump box) or another vehicle.

Jumper cables are long, thickly insulated cables with toothy clips on one or both ends. These clips are called alligator clips. The clips are distinguished by color, usually red and black, to indicate positive and negative polarity. The red clip is positive. The black clip is negative.

Jump boxes are portable batteries used to jump start a vehicle without connecting to another vehicle and come with special jump cables. These cables connect the jump battery directly to the dead car battery. Road side assistance usually uses a jump box when helping stalled vehicles.

What do you need to know about car batteries to jump start a car?

Car batteries have two larger nubs, called terminals. There is a positive terminal and a negative terminal. Each should be clearly marked. Connecting cables to the right terminal is important to completing the circuit and gives power to the dead battery.

  • Positive terminal – The positive terminal is usually the bigger of the two terminals. It is marked with “POS” or “+”. It will connect to the positive clip on the jumper cable, which is usually red.
  • Negative terminal – The negative terminal on the battery is usually marked with “NEG” or “-”. This will attach to the other clip, which is usually black.

CAUTIONS WHEN JUMP STARTING A CAR: 

  • READ THE OWNER’S MANUAL. Some cars are not recommended for jump starting because they have sensitive circuitry
  • DO NOT JUMP corroded, cracked, leaking, or visibly damaged batteries
  • DO NOT JUMP frozen batteries
  • DO NOT JUMP dry batteries
  • DO NOT TOUCH CLIPS together. This is true when connected, but get in the habit by never touching the clips together.

Protect the donor battery

A quick test that there is enough voltage for the donor, be sure that the car giving the jump start headlights are steady and bright when the car is started. If the headlights dim, that can signal that the battery is low.

How do you use jumper cables to jump start a car from another vehicle?

  1. CHECK BATTERIES: Make sure that the battery giving the jump has enough voltage and is a matching voltage system type (12V, 6V, etc.)
  2. READY CARS: Put both cars in park or neutral, turn the ignitions off, and put on the parking brake.
  3. OPEN THE HOOD of each car.
  4. ATTACH ALLIGATOR CLIPS to the terminals in the following order:
    • Red to Dead – Connect red, or positive, clip to the positive terminal on the battery of the dead car.
    • Red to Donor – Connect the red, positive, clip to the positive terminal on the donor battery on the other car.
    • Black to Donor – Connect the black clip to the negative terminal of the donor car.
    • Black to Metal – Connect the black clip to an unpainted metal part of the dead car that is not directly next to the battery. One of the metal struts that hold the hood open is a good place to clip the second black, or negative, clip.
  5. START THE DONOR CAR so that the battery can supply power to the dead battery.
  6. IDLE the donor car, allowing it to run for a few minutes.
  7. TEST the interior light of the car being jump started. If it goes on, there may be enough power.
  8. START the dead car.

After the car is jump started: 

Unclip the clips in the reverse order you connected them:

    • The black clip on the unpainted metal
    • The black clip from the negative terminal
    • Red clip from the donor car
    • Red clip from the dead car’s battery

If the jump works and your car starts, don’t shut off your engine! Drive around for at least 15 minutes to recharge your battery. If the car won’t start the next time you use it, the battery isn’t holding a charge and needs to be replaced.

Watch these steps for jump starting a car from Safe2Drive.

At A.C. Marmo & Sons, Inc., your road safety is very important to us. Call us at 973-340-9100 or visit our website at https://www.acmarmo.com/ to discuss your auto insurance needs. We can provide coverage from many insurance carriers so you receive the insurance for your budget and needs!

Source: https://www.idrivesafely.com/defensive-driving/trending/how-jump-car-simple-steps-bring-your-car-battery-back-life and https://www.dummies.com/home-garden/car-repair/how-to-jump-start-a-car/